How to use an MPU-6050 with a Raspberry Pi Pico using MicroPython
During Summer 2023 I developed my own quadcopter flight controller from scratch in MicroPython that runs on a Raspberry Pi Pico. As part of this project, my flight controller needed to continuously collect a stream of telemetry data from an onboard IMU (inertial measurement unit).
I wrote an MPU-6050 driver in MicroPython that allows you to interface with an MPU-6050, an inexpensive three-axis accelerometer and gyroscope, using the I2C protocol. I wrote this for my quadcopter flight controller project mentioned above but this can be used in any application, so I am open-sourcing the code and sharing it broadly here.
Unlike other drivers I found online, my driver is only a single .py file (one module), is designed to be very intuitive to read, modify, and use, and only provides the MPU-6050 telemetry data in native Python value types (tuples).
I’ll explain the basic steps to begin collecting telemetry from an MPU-6050 from a Raspberry Pi Pico with MicroPython below:
Hardware Needed
For my basic example you’ll need:
- Raspberry Pi Pico (Pico W works as well)
- MPU-6050
- Breadboard
- 4 male-to-male jumper wires
- USB to plug into your computer
Step 1: Wiring
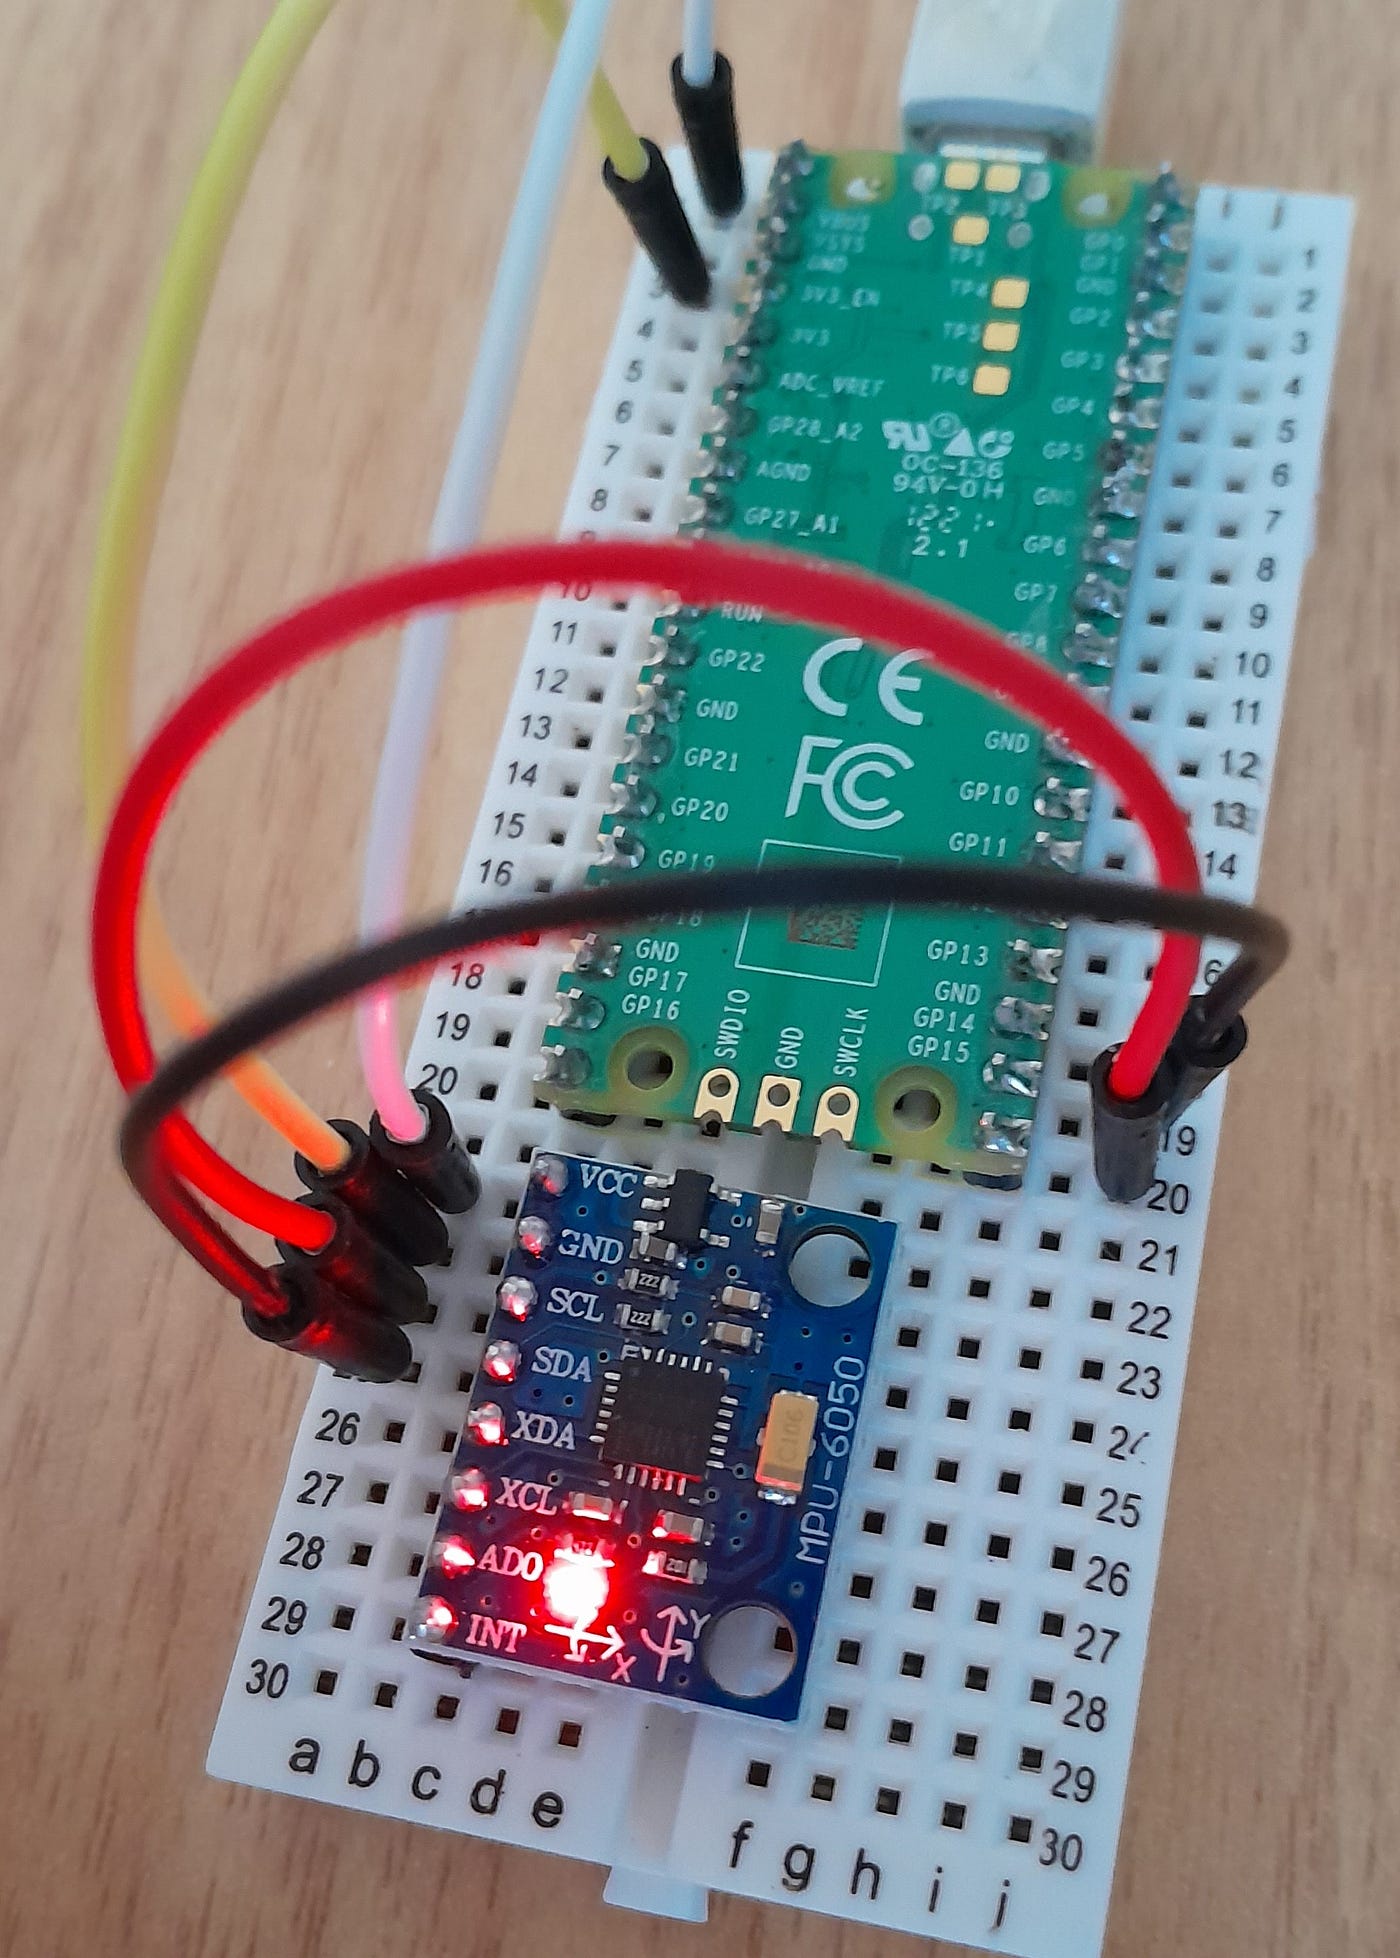
- Plug your Raspberry Pi Pico into the breadboard
- Plug your MPU-6050 into the breadboard directly below the Raspberry Pi Pico
- Connect the MPU-6050’s VCC pin to the Raspberry Pi Pico’s VBUS pin (pin 40)
- Connect the MPU-6050’s GND pin to one of the Raspberry Pi Pico’s GND pins (I am using pin 38 here)
- Connect the MPU-6050’s SCL pin to GP15 (pin 20) on the Raspberry Pi Pico
- Connect the MPU-6050’s SDA pin to GP14 (pin 19) on the Raspberry Pi Pico
Step 2: Upload MPU6050.py Module to Pico
Below is the MicroPython driver for the MPU-6050:
You can use the code in the snippet above, but any updates to this code will be available in my MicroPython-Collection repo on GitHub here.
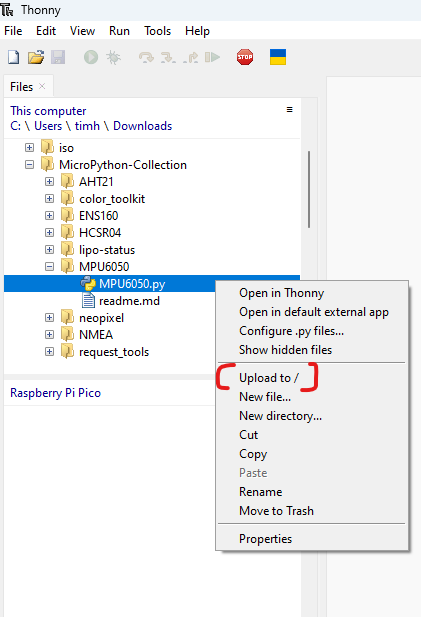
To upload this code snippet to your Raspberry Pi Pico, follow the steps below:
- Download the file from the snippet above and save to your computer as
MPU6050.py. - Plug your Raspberry Pi Pico (with MicroPython already installed on it) into your computer with a USB cable. Open Thonny
- Find the
MPU6050.pyfile you downloaded in step 1 above in the Files pane in the top right, right click on it, and select Upload to /:
4. After uploading the MPU6050.py file to your Raspberry Pi Pico, you should see it now in the Pico's directory:

Step 3: Capture Telemetry!
With the MPU6050.py module now loaded onto the Pico, you are now ready to begin collecting telemetry from the MPU-6050! Open a new code file in Thonny by clicking on the new button at the top left of the window. Paste in the following test code:
Next, click the green Run current script button at the top left and watch your Raspberry Pi Pico begin to read telemetry from the MPU-6050 using I2C!